Turning wood bowls is a fun and rewarding hobby. It’s a great way to use up scrap wood, and you can make some beautiful and useful pieces. The basic process is fairly simple: you start with a piece of round wood, mounted on a lathe.
You then use various tools to shape the wood into a bowl.
There are many different ways to turn a bowl, and you can get creative with the shapes and sizes. You can also add embellishments like handles or feet.
With practice, you’ll be able to turn out lovely bowls that will be the envy of your friends and family.
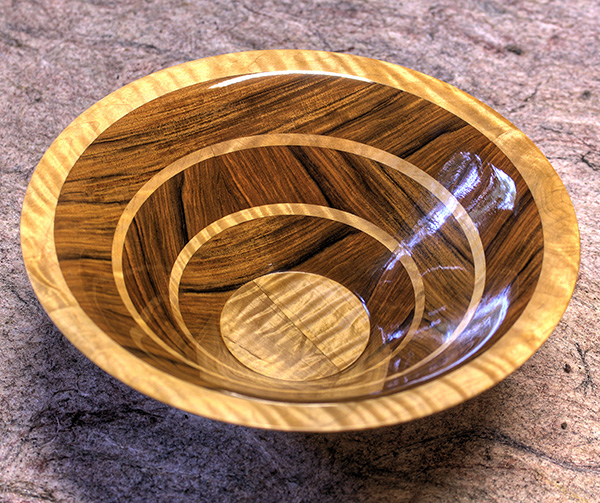
There’s something special about a hand-turned wood bowl. Unlike mass-produced bowls made from machine-cut wood, each handcrafted wood bowl is unique. The natural grain of the wood shines through, and the smooth surface feels good to the touch.
If you’re thinking about trying your hand at turning a wood bowl, there are a few things you should know. First, it’s important to start with a piece of softwood that has been properly seasoned. This will help to prevent cracking and warping as you work.
Second, it’s best to use a lathe when turning your bowl. This tool will allow you to work more quickly and evenly than if you were doing it by hand. Finally, be sure to sand your bowl smooth before applying any finishes.
With these tips in mind, give it a try! You may just find that you enjoy this relaxing and satisfying hobby.
Bowl Turning Techniques
Bowl turning is a woodturning technique that can be used to create bowls, platters, and other vessels. The basic process involves mounting the workpiece on a lathe and shaping it with hand-held tools. Bowl turning can be done using a variety of techniques, depending on the desired results.
One of the most common bowl turning techniques is spindle turning. This method involves mounting the workpiece between centers on the lathe and shaping it with hand-held chisels and gouges. The advantage of this technique is that it allows for greater control over the shape of the bowl.
Another popular bowl turning technique is faceplate turning. This method involves attaching the workpiece to a faceplate with screws or nails and then shaping it with hand-held chisels and gouges. The advantage of this technique is that it allows for more complex shapes to be created.
Which ever technique you choose, there are a few things to keep in mind when turnings bowls:
– Always use sharp tools for best results
– Work slowly and carefully to avoid mistakes
Credit: www.wood-database.com
What is the Best Wood for Turning Bowls?
There are a variety of woods that can be used for turning bowls, but some are better than others. The best woods for turning bowls are those that are strong and dense, yet still easy to work with. Some good choices include maple, oak, cherry, and walnut.
Each of these woods has its own unique grain pattern and color, so you can create a one-of-a-kind bowl that is truly your own.
When choosing a wood for turning bowls, it is important to consider the type of woodturning you will be doing. If you plan on using power tools, then a denser wood like maple or oak is a good choice.
If you prefer to work with hand tools, then a more delicate wood like cherry or walnut may be a better option. Whichever type of woodturning you prefer, there is sure to be a wood that is perfect for your needs.
How Long Does It Take to Turn a Wood Bowl?
Assuming you are starting with a block of wood, it will take at least a few hours to turn a wood bowl. The time will vary depending on the size and shape of the bowl you are trying to create. If you are experienced with using a lathe, you can probably finish the project in one sitting.
Otherwise, it may take several sessions to complete.
The first step is to cut the block of wood into a rough cylinder using a bandsaw or other power tool. Then, mount the cylinder onto the lathe and begin shaping it into a bowl form.
This process takes some time and patience, as you slowly remove material from the sides of the cylinder until it resembles a bowl shape.
Once you are happy with the overall shape, use sandpaper to smooth out any rough edges. Finally, apply a finish of your choice (e.g., lacquer, oil) and let it dry completely before using your new wood bowl!
Do You Need to Dry Wood before Turning?
Most woodturners will tell you that it is best to dry your wood before turning. There are a few reasons for this. One reason is that when wood is first cut, it still has a high moisture content.
This can cause the wood to warp or crack as it dries and shrinks. Drying the wood first helps to prevent this from happening.
Another reason to dry your wood before turning is that it makes the turning process easier.
Wetter wood is more difficult to turn and can cause your tools to slip or chatter. Dryer wood is easier to work with and produces a smoother finish.
If you do choose to turn wet wood, there are a few things you can do to help prevent damage.
First, use sharp tools and take light cuts. Second, try not to remove too much material at once – work in small increments so that the heat generated by friction doesn’t have time to build up and cause cracking. Finally, keep an eye on the moisture content of the wood and stop turning when it starts to feel dry – don’t wait until it’s completely dry or you may end up with cracks or checks (splits).
How Do You Turn a Bowl Without a Chuck?
There are a few ways to turn a bowl without using a chuck. One way is to use a faceplate. To do this, you would first attach the faceplate to the lathe with screws.
Then, you would center the bowl blank on the faceplate and mark it where it needs to be drilled for screw holes. Next, you would drill pilot holes in the bowl blank and then countersink those holes. After that, you would put screws into those holes and tighten them until they are snug against the bowl blank.
Finally, you can start turning your bowl.
Another way to turn a bowl without using a chuck is by using vacuum chucking. This method uses suction to hold the workpiece in place.
First, you need to make or purchase a special vacuum chuck for your lathe. Then, you mount the vacuum chuck on your lathe and turn it on. Next, apply some sealing wax or similar material around the outside edge of your bowl blank (this will help create a good seal).
Put your bowl blank onto the vacuum chuck and wait for it to create suction. Once there is suction, start turning your bowl!
How to Turn a Basic Bowl-Part I
Conclusion
Wood bowls are a beautiful and unique addition to any home, and they can be made relatively easily with the right tools and materials. Turning wood bowls is a process that involves shaping wood on a lathe to create a smooth, round bowl shape. It takes some practice to get the hang of it, but it’s definitely doable with a little patience.
And, once you’ve mastered the technique, you’ll be able to make all sorts of different kinds of wood bowls – from simple ones to more elaborate designs.